Rye Devils Food Loaf Cake
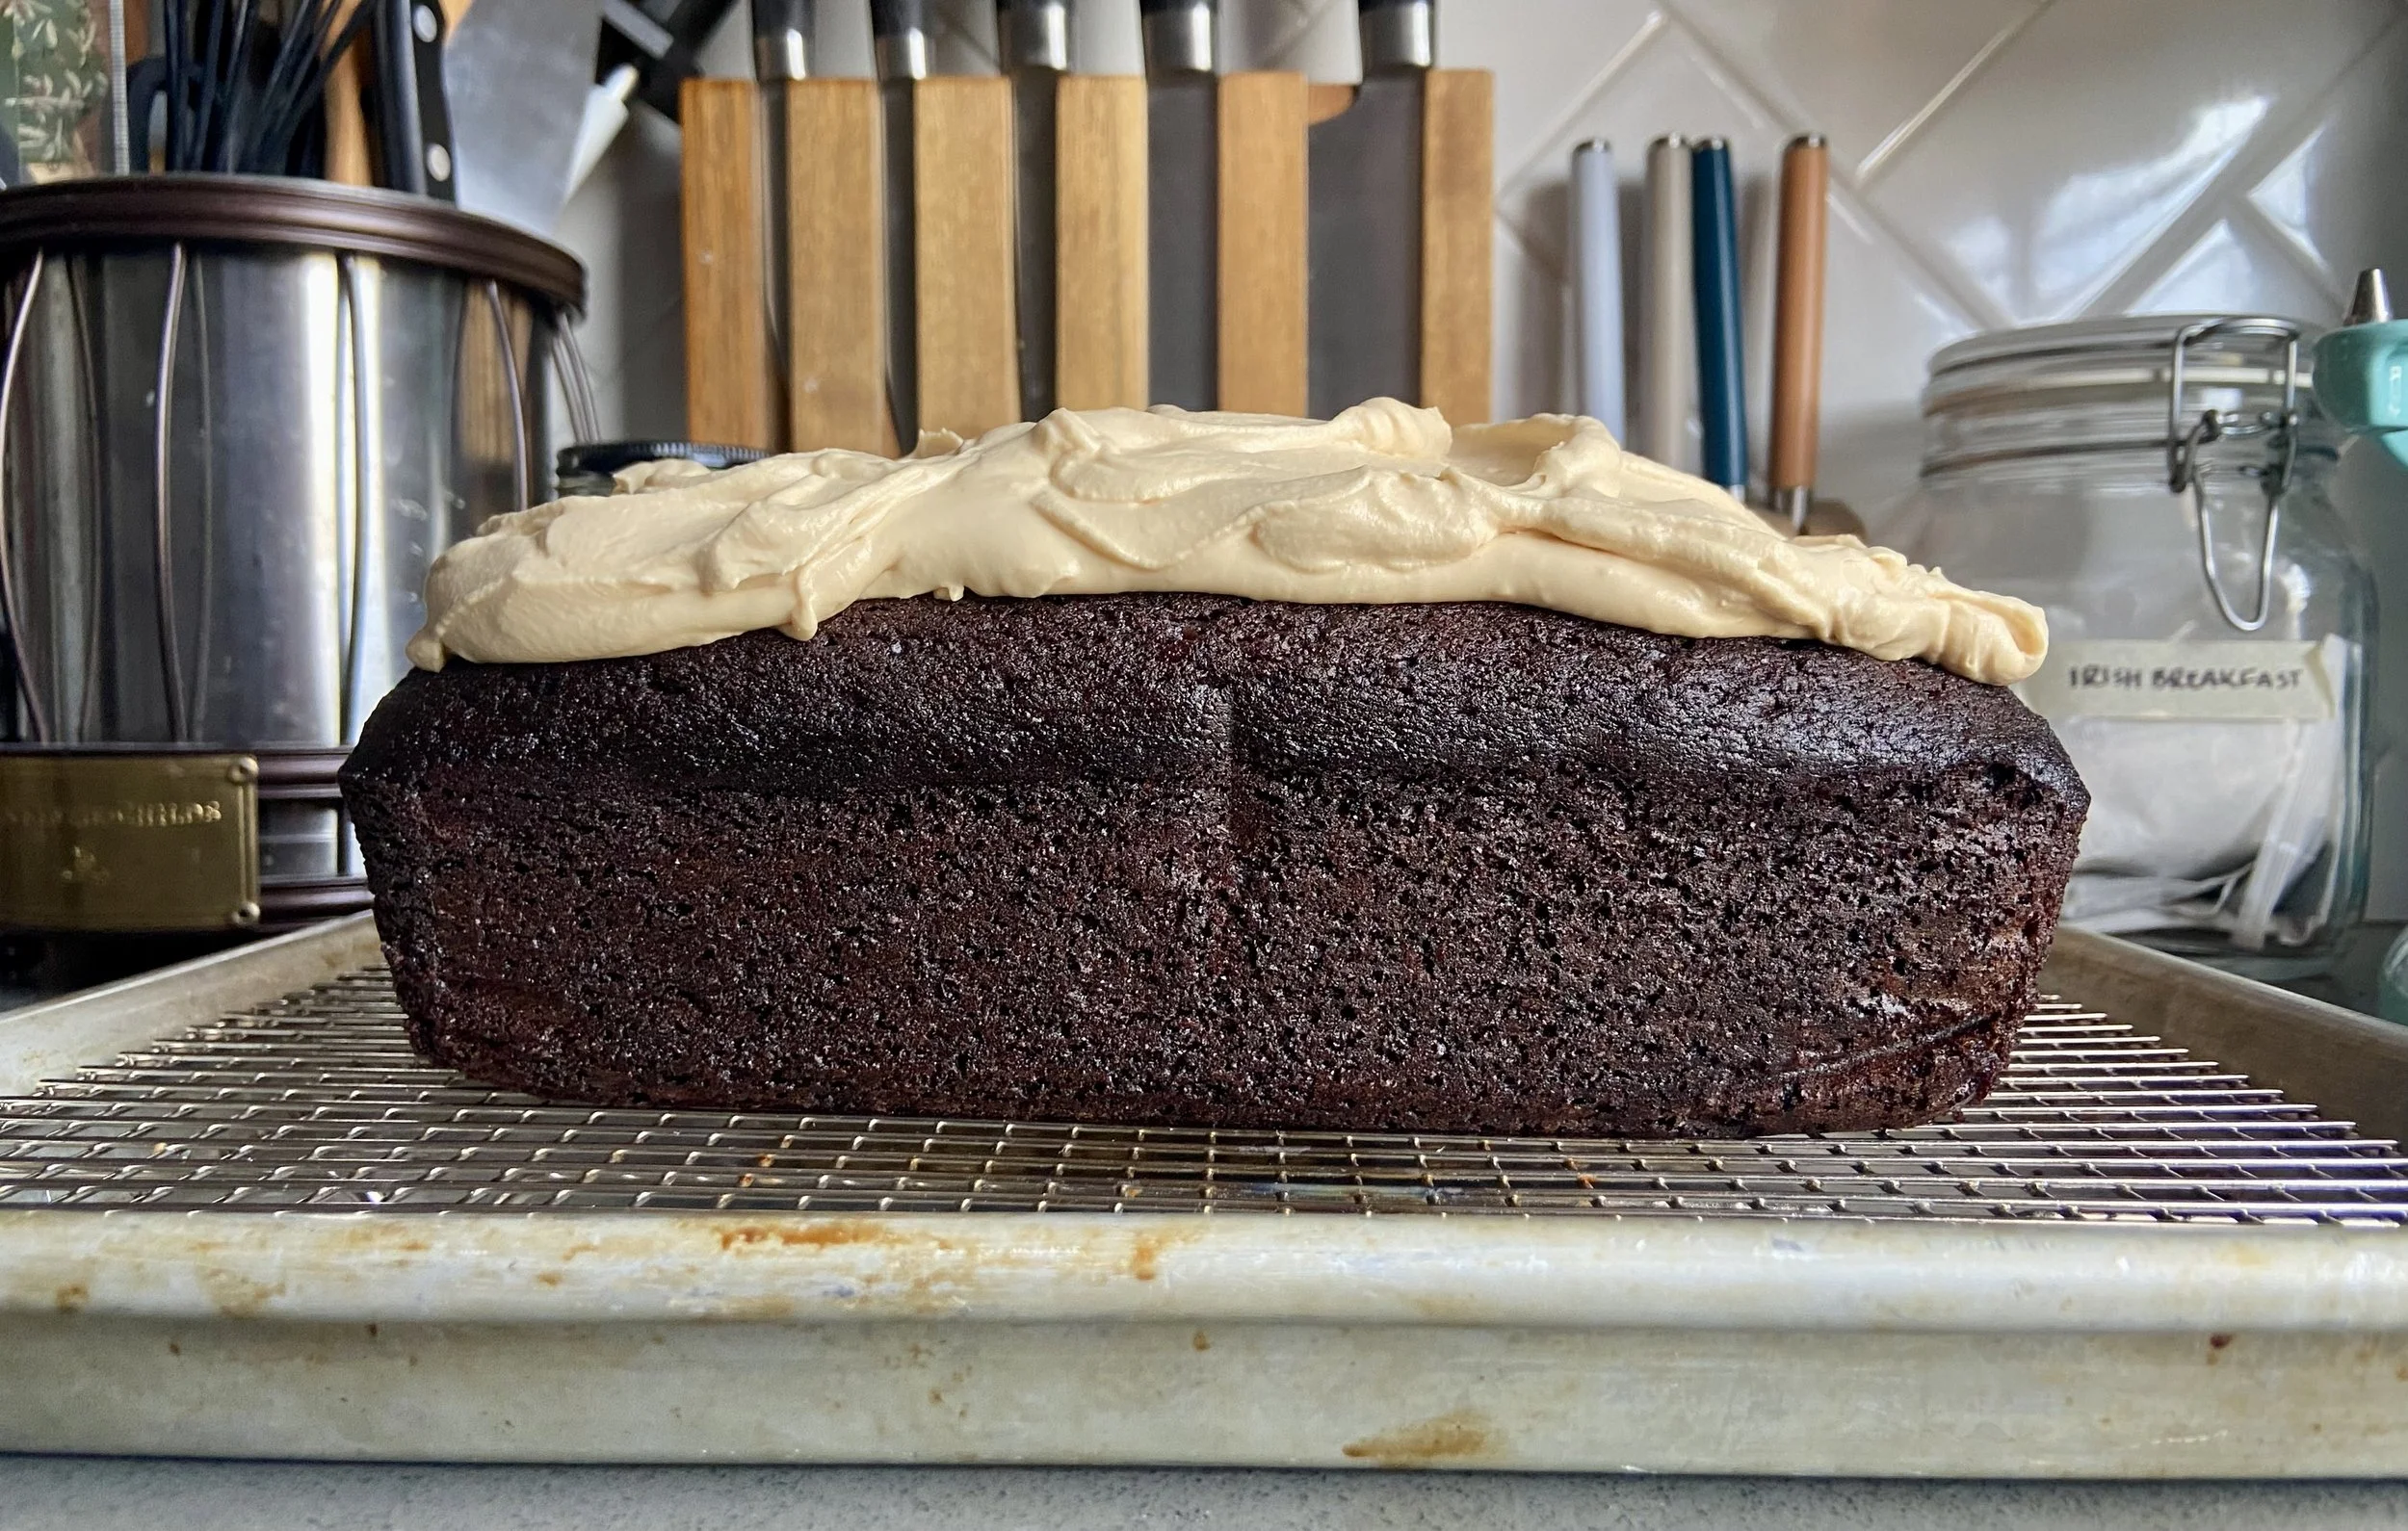
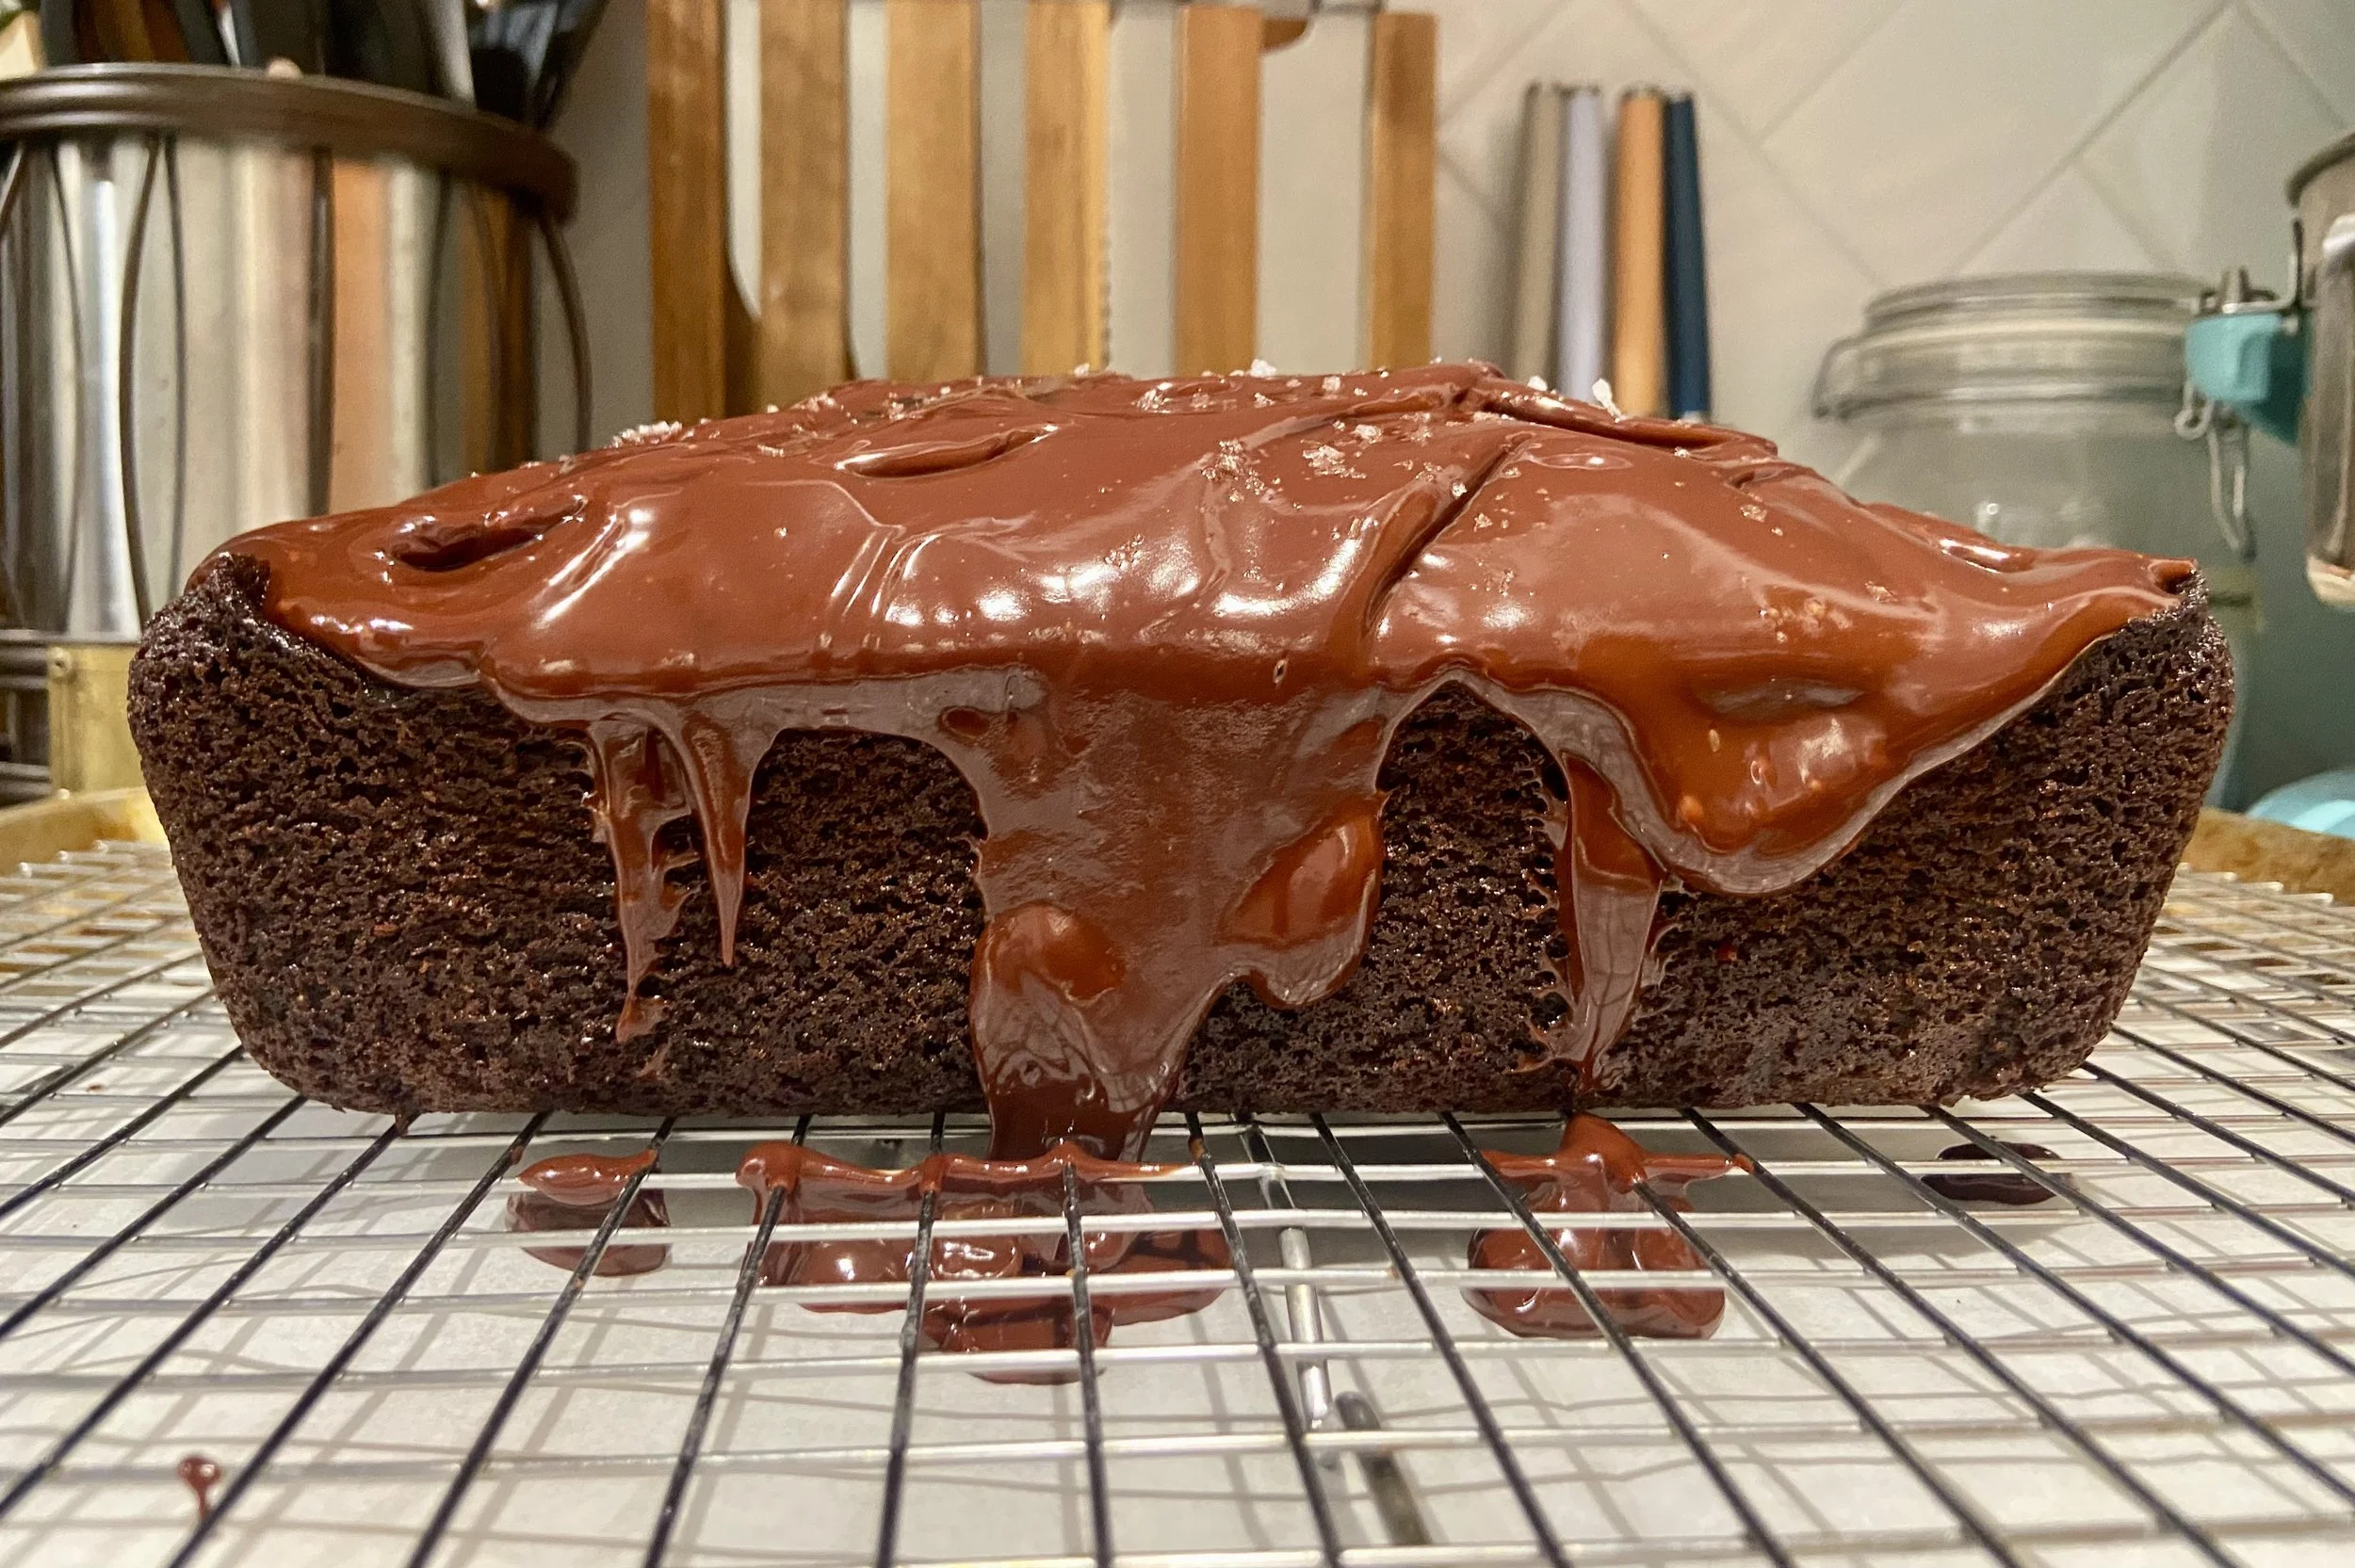
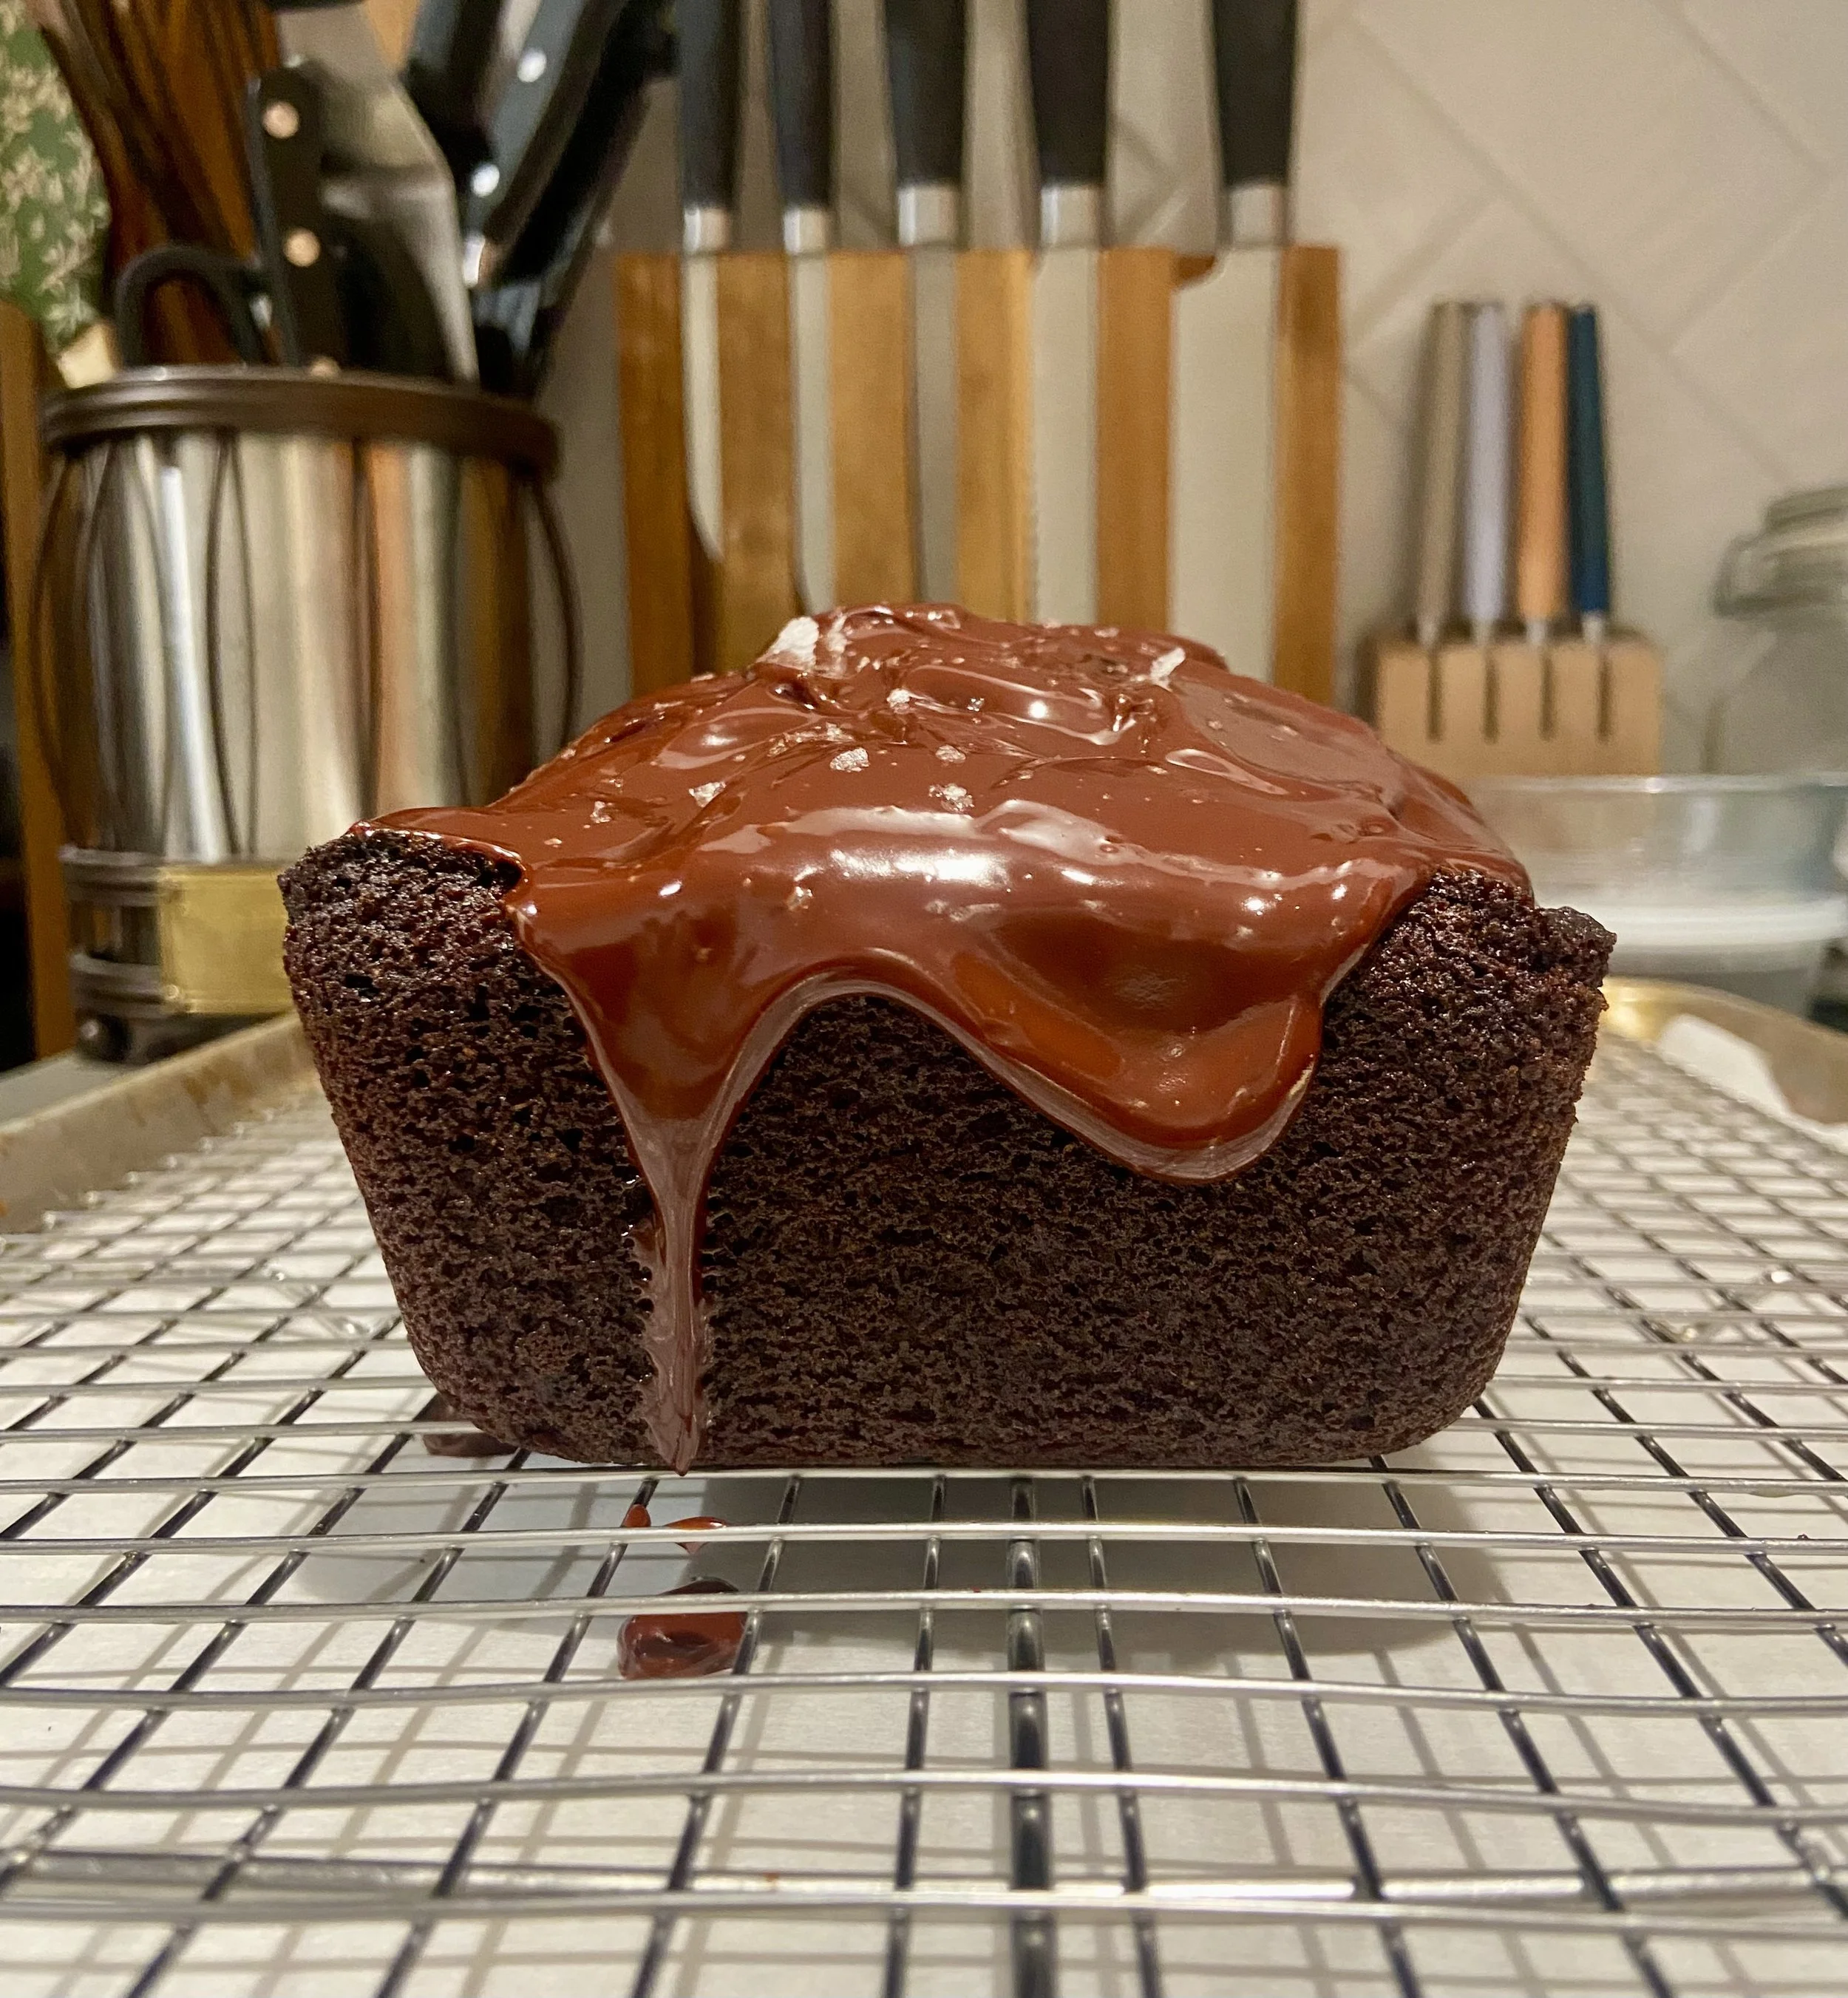
Here we have a bit of a choose your own adventure because there are two different topping options, or three if you’re feeling like going big. Picture above is a whipped salted caramel topping and picture below is a dark chocolate ganache topping. Use one or the other or both!
This cake is a deep, dark, chocolatey devils food cake, just in a loaf form. Mainly because it feels more acceptable to eat a slice a cake on a random Tuesday when it is from a loaf and not a round cake. I can’t be the only one who feels this way, right?
But with that being said, and this seemingly being a rather straightforward chocolate cake, I do have a few notes on the ingredients. First, as I am sure you noticed in the name, and as the second ingredient listed, this cake includes rye flour (along with all purpose). While rye is most famous as a type of bread used in savory applications, it can work really well in certain sweet baking situations as well. I think a lot of people conflate the flavor of caraway seeds with the flavor of rye flour, because most rye sandwich bread has those little seeds speckled throughout it. That bitter, licorice flavor that you may associate with rye bread actually comes from the caraway seeds. On its own, rye flour has an earthy, nutty flavor. And when paired with chocolate, those qualities in rye actually make the chocolate taste more chocolatey. So by swapping out a portion of the all purpose flour for rye flour in a chocolate, I’m not really trying to make the cake taste like rye, but rather trying to include ingredients that will further prop up the chocolate.
Rye also impacts the final texture of the cake. This has to do with the gluten make up of rye, and the short version is simply that is contains very little of the type of the gluten that contributes to chewy, tough textures. And as a result, lends itself well to create a soft, tender crumb. If you would like a more detailed explanation, you can jump down to “notes” at the bottom of the page.
Now on to cocoa powder! There are a few different types of cocoa powder on the market these days - unsweetened, natural, Dutch- processed, black - and they all are a bit different in flavor and appearance. My preference, and what I use for almost all of my baking, is Dutch-processed cocoa powder. Dutch-processed is simply natural cocoa powder that has been treated with an alkalizing agent. That process neutralizes the acidity of the cocoa, which smooths out the flavor and deepens the color. I prefer the smoother, less acidic flavor and find it balances well with my preference for less sweet desserts. While cocoa powders aren’t always easily interchangeable, the use of both baking powder and soda in this recipe means you could use natural cocoa powder in a pinch. But when shopping for cocoa, if “dutch-processed” isn’t written on the front label, just the check the ingredients, which should be “cocoa powder, alkali.”
Hot coffee! Yes, the recipe specifically calls for hot coffee and it means the coffee should be HOT. Devils food cakes (and often other variations of chocolate cakes with cocoa powder) will call for a hot water as the main liquid ingredient. This is because the heat blooms the cocoa powder, making its flavor stronger and more prominent in the batter. I call for hot coffee because small amounts of coffee added to chocolate desserts can amp up the chocolate flavor without making it taste like coffee. You may be noticing a pattern here. First the rye, then the cocoa powder, and now the coffee. I want this cake to be super chocolatey. If you do not like coffee, I promise, this cake does not taste like coffee. But if you really don’t want to or can’t use coffee, no worries, hot water will do just fine! But if you do use coffee, strongly brewed coffee or espresso will work. I even keep instant espresso powder on hand for just such occasions when I don’t have any fresh coffee on hand.
Last but not least, the ganache recipe calls for a touch of light corn syrup. While I don’t often use corn syrup in my baking, mainly because I don’t enjoy the super sweet flavor it imparts, a small amount added to ganache will give it a beautiful glossy texture (without compromising flavor). So while it is optional, just note that the ganache will turn matte as it sits on the cake if it is not included. It will still taste delicious and look nice, it just won’t retain the glossiness that is pictured below.
Makes: 1 x 9x5” loaf cake
Active time: 20 minutes
Total time: 1 hour 30 minutes
Ingredients
Cake
135g (1 cup) all purpose flour
80g (2/3 cup) rye flour
1 teaspoon kosher salt
3/4 teaspoon baking soda
1/4 teaspoon baking powder
45g (1/2 cup) cocoa powder, dutch processed
210g (1 cup) brown sugar, packed
154g (2/3 cup) hot coffee
294g (1 1/3 cup) vegetable oil
2 eggs, large
75g (1/3 cup) whole milk
Whipped Salted Caramel
53g (1/4 cup) granulated sugar
250g (1 cup) heavy cream, divided
1/2 teaspoon kosher salt
Ganache
100g (1/4 cup +3 tablespoons) heavy cream
30g (2 tablespoons) light corn syrup
100g (3.5 oz) bittersweet chocolate, roughly chopped
flaky salt
Method
Make the cake. Preheat oven to 350F. Prepare a 9x5” loaf pan by lightly spraying and lining the bottom and long sides with a piece of parchment with a 1” overhang. Set aside.
In a medium bowl, combine 135g (1 cup) all purpose flour, 80g (2/3 cup) rye flour, 1 teaspoon salt, 3/4 teaspoon baking soda, and 1/4 teaspoon baking powder. Set aside.
In the bowl of a stand mixer, add 45g (1/2 cup) cocoa powder and 210g (1 cup) brown sugar and mix on low with the whisk attachment just until combined.
Pour in 154g (2/3 cup) hot coffee and mix on medium low for 1 minute. Scrape the sides and bottom of the bowl.
In a large liquid measuring cup, combine 294g (1 1/3 cup) vegetable oil, 2 eggs, and 75g (1/3 cup) whole milk. No need to mix.
With the mixer running on medium, stream in the oil/egg/milk mixture. The batter should look thick and glossy.
Add in the dry ingredients and mix on low until just combined. Remove the bowl from the mixer and give the batter a final few stirs to combine.
Pour batter into the prepared loaf pan and bake for 1 hour to 1 hour and 10 minutes. The cake will feel firm, but give when pressed and a toothpick inserted in the middle will come out with just a few crumbs attached (crumbs should look baked and not wet) when it is finished.
Allow the cake to cool for about 15-20 minutes in the pan, then use the parchment overhang to carefully lift it out. Let it cool completely on a cooling rack.
The untapped cake can never be made 1 day in advance. Once fully cooled, wrap tightly and leave at room temperature. If you need to hold it for longer, the tightly wrapped cake can be held frozen for a week or so. Allow it to defrost before topping.
Make whipped salted caramel. Skip to step 16 if you are just making the ganache. While the cake is baking, warm 1/4 cup (63g) heavy cream in a microwaveable glass measuring cup or in a small saucepan. Set aside, but nearby, while you make the caramel. Place 53g (1/4 cup) granulated sugar in a small saucepan or higher sided sauté pan over low heat. Do not walk away. We are making a dry caramel, which is when you simply melt and caramelize sugar on its own, no water used (jump to notes for a more detailed explainer on making caramel). So, gently warm and melt the sugar over low heat. You will be tempted to turn up the heat initially because it will take a bit for the sugar to get hot enough to finally start melting. Don’t do it. Let it take its time at first and start to stir as the sugar is melting to encourage even melting and to avoid hot spots that get too dark before the rest of the mixture. If spots of the caramel are moving too fast or start the smoke, pull it off the heat and continue to stir. When the caramel turns a dark golden amber, turn off the heat and carefully pour in the reserved warm cream. The caramel will bubble and sputter and let out a lot of steam. Carefully stir to combine the caramel and cream. If some of the caramel has seized (pieces have hardened and separated from the cream), turn the heat back to low and continue to stir until the mixture has come together and is bubbling. Remove from the heat, stir in 1/2 teaspoon salt.
Pour the salted caramel in a heatproof bowl and allow it to fully cool at room temperature. Once it is cool, pour the remaining 188g (3/4 cup) heavy cream in the bowl of a stand mixer and with the whisk attachment, mix on medium just until the cream starts to thicken. Add in the cooled salted caramel and continue to whip until soft peaks form. This means that when you drag the whisk through the mixture, it will mound and keep its shape a bit, but slowly slump into itself.
The whipped cream can be made a couple hours ahead of topping. Hold in the fridge and lightly rewhip when ready to use.
To top, use a mini offset spatula or large spoon to spread the whipped cream and create nice little swooshes. If not serving immediately, hold the topped cake in the fridge.
Leftover cake will last up to 3 days, covered in the fridge.
Make the ganache. In a medium heatproof bowl, put the roughly chopped 100g (3.5 oz) bittersweet chocolate. Set aside.
In a small saucepan, heat 100g (1/4 cup +3 tablespoons) heavy cream and 30g (2 tablespoons) light corn syrup over low heat. Once the mixture comes to a bowl, remove from the heat and pour over the chopped chocolate. Let sit without touching for 5 minutes.
Using a whisk, gently mix the chocolate and cream mixture until well combined. It should be thick but still pourable and very glossy.
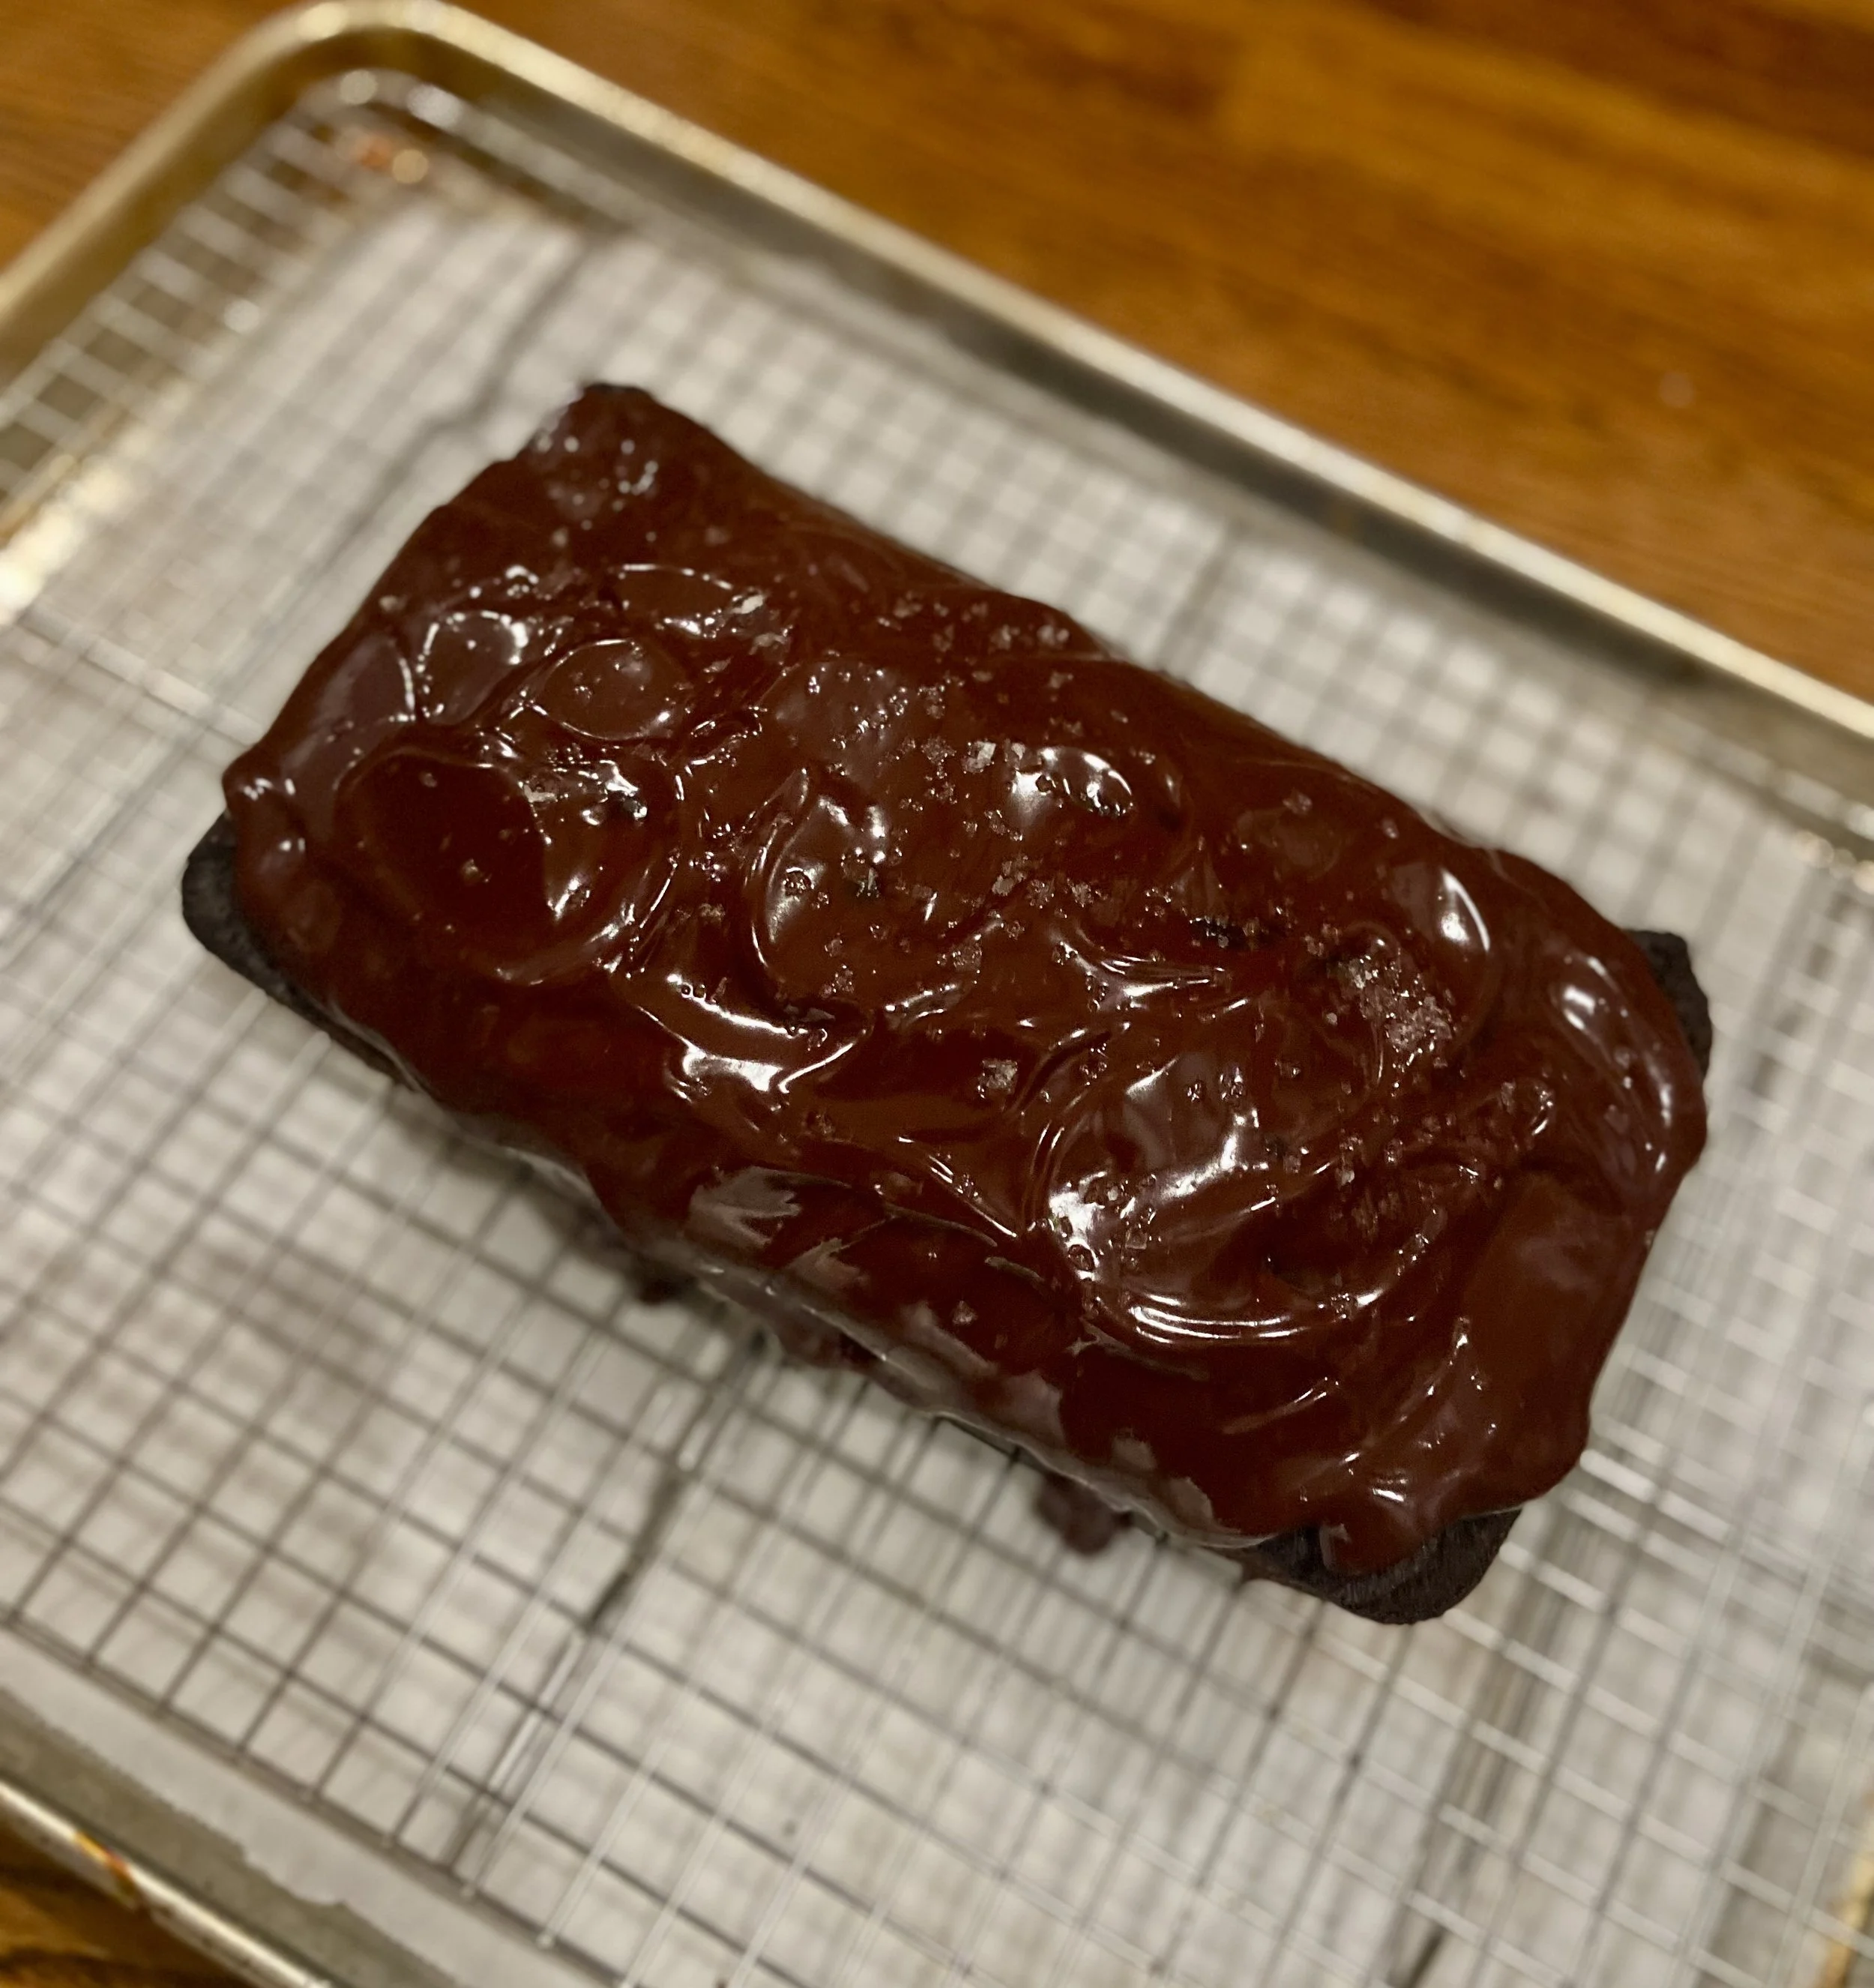
Place the cake on a cooling rack set inside a sheet pan and pour the ganache over the cake, allowing it to pour off the sides and ends. Use a mini offset spatula or large spoon to spread the ganache around and create some swooshes. Sprinkle with some flaky salt.
Ganache covered cake can be held at room temperature. Leftovers will last up 3 days, covered at room temperature.
If you choose to go the route of both toppings, I would recommend topping the cake with ganache and serving with dollops of whipped salted caramel.
Notes
I prefer to make caramel this way as you can stir it all you want without any concerns for crystallization (grittiness in the caramel).When you introduce water to sugar, it changes the crystal structure and if you stir the sugar water mixture while it cooks, that mixture can splash onto the sides of the pan and form new crystalline structures that will not break down and melt back into the mixture no matter how hard you try. This is why caramel made through the wet method (sugar + water) usually warns against stirring until the sugar caramelizes and tells you to have a wet pastry brush nearby to wet the sides of the pan. While there are definitely times and places to use that method for certain sugar syrups, I think it is a lot more work than its worth for caramel, especially since there is an easier way. The only concern with the dry method, is that it can be easier to burn the caramel if you walk away or have hot spots on your pan. But if you keep the heat low and stir as it starts to melt, you should easily be able to avoid any issues.
While rye flour often has a higher protein content than your average all purpose flour, the make up of the protein (gluten) is different. There are two types of gluten in rye and wheat flours - gliadin and glutenin. Gliadin creates sticky and extensible bonds, meaning when they are activated the stick together really well and allow the dough to be stretched without breaking. Glutenin creates elasticity and strength, meaning it gives the dough the ability to snap back when it’s been stretched out. Unlike wheat flours, which contain similar amounts of both gliadin and glutenin, rye contains far higher amounts of gliadin. So what does that mean? Well, the elastic properties of glutenin are what can give a chewy or tough texture. While those textures may be desired in something like a sourdough loaf, they are not pleasant in a cake. Bakers work to control how strong the gluten bonds are by how much they mix a dough or batter. Bread is mixed a lot to create strength, whereas most cake recipes caution you to not overmix once the flour is added. Therefore the higher amount of gliadin in rye flour means there are far fewer opportunities for the strong, stretchy bonds to form, which in turn create chewiness and toughness once baked. In bread making, this means that rye dough can be sticky and tricky to work with. But in cakes, the gliadin rich rye allows for a softer, more tender crumb.